
Getting started
This page takes you from nothing to a first trade: install, setup, a paper trade, then live.
What you need
Section titled “What you need”- A Mac on macOS 13 or later, or a Linux machine, on arm64 or x64. On Windows, use WSL 2 and the Linux route.
- A Candle account. Any plan works. Your Candle plan says what each one adds.
- One AI coding tool, with its own account: Claude Code, Codex, Grok, OpenCode or Pi. Your agent runs on it, signed in as you, so it needs its own subscription or API key apart from Candle. If you have none, setup tells you how to install one, and notices it within a few seconds.
With that tool already signed in, setup takes about 5 minutes. Allow longer if you install or sign in to it first. Two steps open your browser: Candle’s sign-in, and the coding tool’s own if it isn’t signed in yet.
You don’t need Candle’s CLI first. The installer offers to install it.
1. Install
Section titled “1. Install”curl -fsSL https://github.com/candledottv/harness/releases/latest/download/install.sh | bashThe installer checks the Candle Harness’s checksum and signature before it puts anything in place, and installs nothing if a check fails. If you have no candle CLI, it asks before installing Candle’s too. If the folder it installs to isn’t on your PATH, it prints the one line to add for your shell. Installing has the details.
2. Open it
Section titled “2. Open it”candle-harnesscandle tui does the same. With no agent set up yet, the Candle Harness opens on setup.
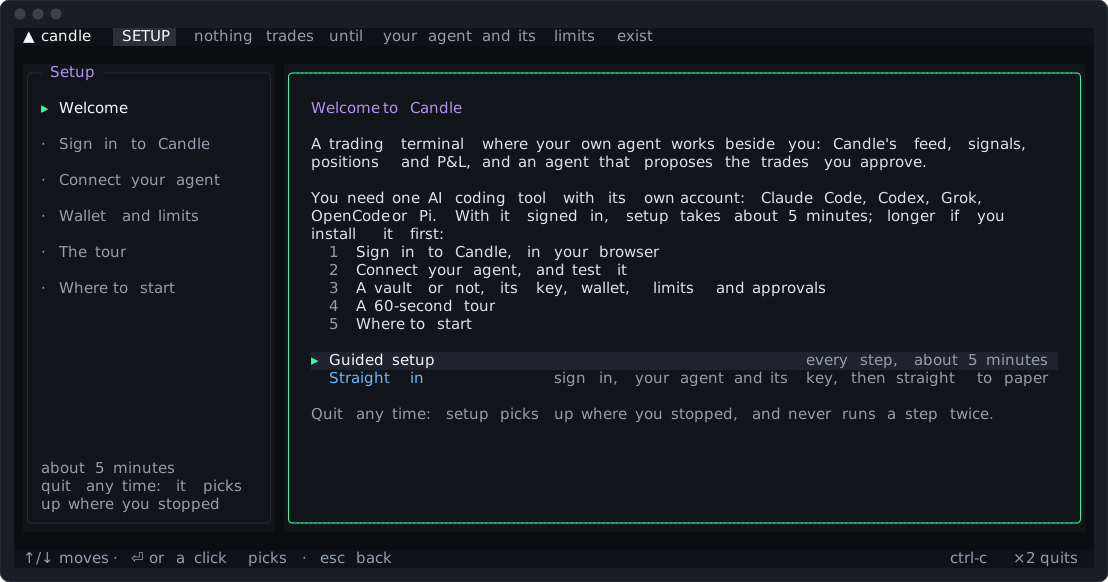
Setup’s steps are listed down the left, and each one is ticked as it’s done. You can quit at any time (ctrl-c twice): the next candle-harness picks up where you stopped, and no step runs twice. esc goes back a step you chose, until something has been done on Candle’s side.
Guided or straight in. The guided setup takes about 5 minutes with your coding tool signed in, and covers every step. Straight in does the least: it signs you in, picks your agent and its model, makes its key, and opens the Candle Harness on paper.
3. Sign in to Candle
Section titled “3. Sign in to Candle”The Candle Harness runs your own candle CLI, signed in as you.
- If the CLI on this machine is already signed in, setup offers that account.
- If it has several profiles and none is selected, setup asks which one to use.
- Otherwise, setup signs in a new profile with Candle’s device code: a short code and a link, each with a
⧉to copy it. Approve the code in your browser, and setup moves on.
From then on, the Candle Harness acts as that profile on every step. Switching the CLI’s active profile later never moves your agents to another account.
4. Connect your agent
Section titled “4. Connect your agent”Setup lists each coding agent it found, with its version and whether it’s signed in. Pick one to see its models.
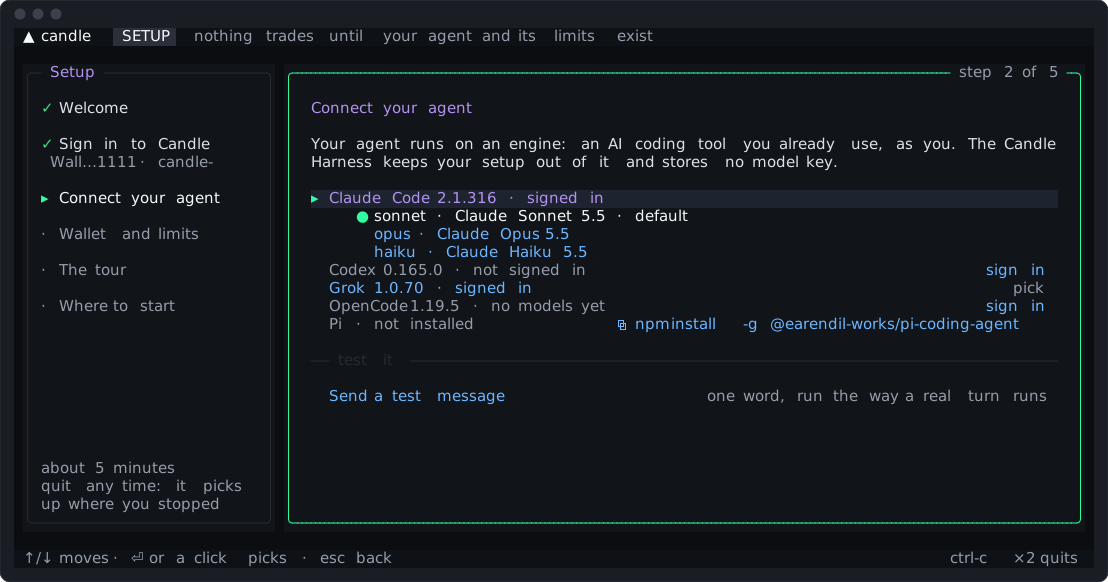
- Pick one. If it isn’t signed in, setup opens its own sign-in in a pane, as you. The sign-in goes into that agent’s own store; the Candle Harness never keeps a model key.
- Pick a model, or leave the agent’s own default.
- Send the test message. It’s one word, run the way a real turn runs. Once it answers, Continue goes on.
You can change the engine or the model at any time later with ctrl-g. Your agent and Engines say more.
5. Wallet and limits
Section titled “5. Wallet and limits”A vault, or the embedded wallet only, for now. A vault keeps your recovery words on this machine and guards every owner step (such as making a key) with a passphrase. You need one for a wallet of its own for your agent, or to send funds from the Candle Harness. You don’t need one to trade from your account’s embedded wallet, and you can add one later from settings ▾. Without a vault, owner steps (such as making the key) run in the pane with no passphrase. Where Candle asks, an owner step that widens what a key can do (making a key, allowing it the embedded wallet, moving or promoting a wallet to it) also waits for your approval in the browser, signed in as the account’s owner: the pane shows the link and a code, and waits up to 5 minutes.
Its key. Your agent trades with a key of its own, made by Candle’s CLI in a pane and stored straight into the Candle Harness. It never shows on screen. Setup offers to set Candle’s own cap on the key as it’s made: a dollar amount a UTC day, which Candle enforces whatever uses the key.
Its wallet. A new key can’t pay from any wallet until you allow one. For the embedded wallet, you type the key’s prefix back in the pane to allow it, then approve it in your browser if Candle asks. A wallet of its own (a TEE wallet) needs a vault, and Pro or Max. Wallets explains both.
Limits. Two limits the Candle Harness holds for this agent: per trade (starting at $10) and per day (starting at $50, from midnight). Setup shows Candle’s limits beside them, each with who holds it. Limits says more.
Approvals. Ask every time is the default: every live trade is a card. Or let the wallet trade inside two figures of its own: buys and swaps inside them run with a receipt in place of the card, and every sell runs without a card, whatever its size, unless its slippage bound is looser than the route’s default. The kill switch still holds buys and swaps; sells still go. You can change this any time in settings ▾ → approvals.
Fund it, or paper. Setup shows the wallet’s address with a ⧉. Send SOL to it from any wallet of yours, and setup moves on by itself when it lands. Or start on paper, which needs no funds.
6. The tour, and where to start
Section titled “6. The tour, and where to start”The tour takes about a minute, over the real screen: your agent, positions, a card, the kill switch, settings ▾ and the palette. → goes on, ← back, esc ends it. The palette’s the tour runs it again. settings ▾ opens by a click, or from the palette (ctrl-k, then type settings or the setting you want).
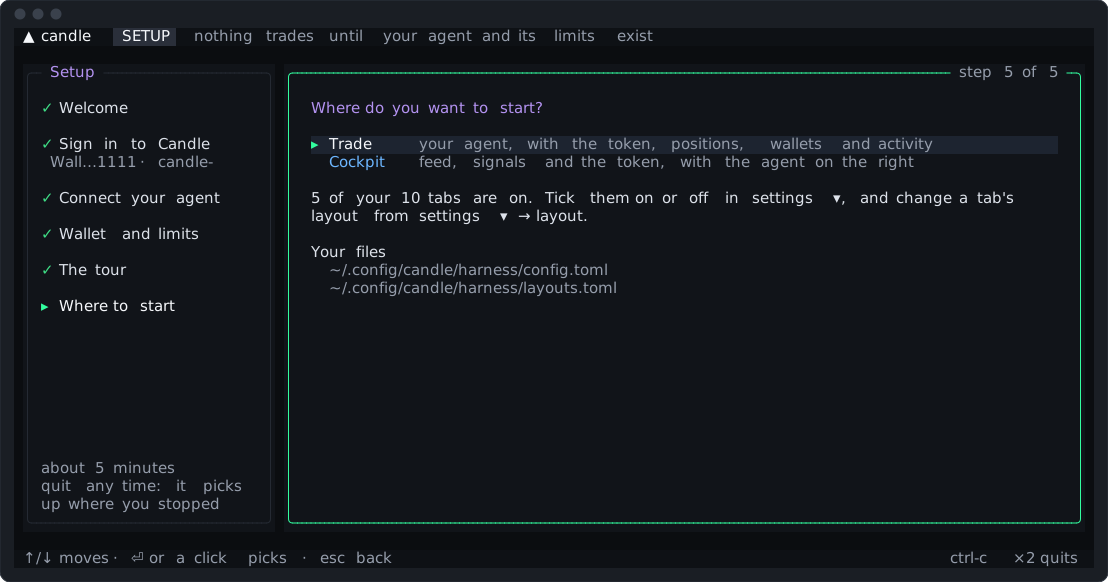
Then pick where to start: Trade, with your agent beside the token, positions, wallets and activity, or the Cockpit, with Candle’s feed, signals and the token, and the agent on the right. The Candle Harness opens on that tab from then on.
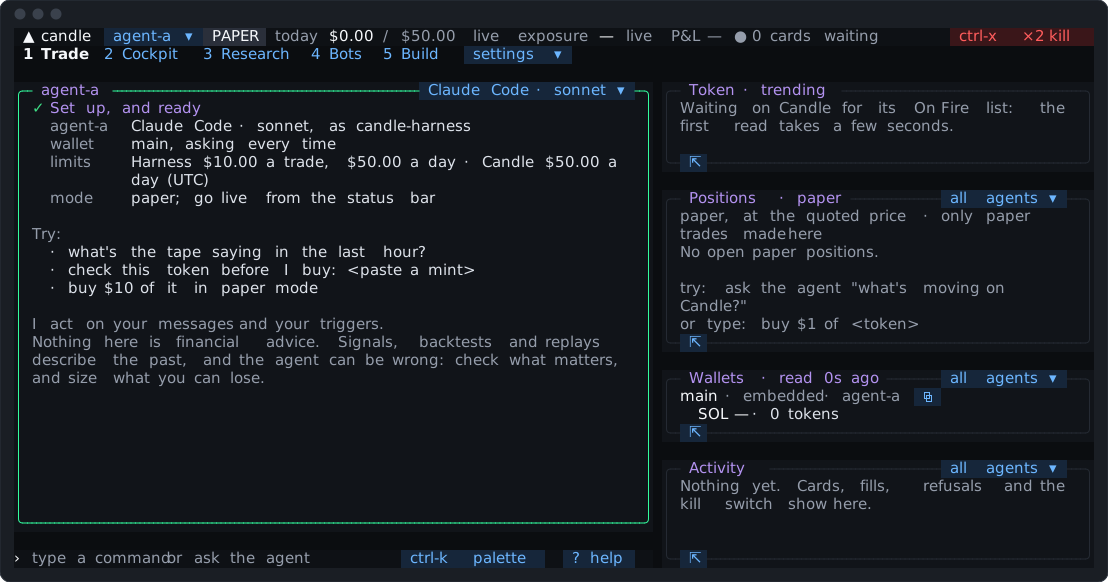
The agent’s first message says what was set up and what to try.
7. A paper trade
Section titled “7. A paper trade”The Candle Harness starts on paper. Ask your agent something, or type a trade yourself. Pick a token a list shows, or paste its address:
what's moving on Solana right now?buy $5 of MOONA token is named by its mint, or by a name a pane or the agent has shown this session, so MOON works once a list or the agent has shown a MOON. A name nobody has shown is never guessed. On paper there’s no card: the trade is recorded at once. The paper trade is recorded at the quoted price, and shows in Positions and Activity.
8. Going live
Section titled “8. Going live”Click PAPER in the status bar, or type live. The Candle Harness asks first, and the question lists what a first live trade would still be missing: a key not yet allowed a wallet (with a chip that types the line that allows it, which matters after straight in), no limits set here, or a wallet with no SOL. y switches; then live trades move real funds. The mode you last picked is kept across restarts.
In live mode, a trade the agent proposes is a card:
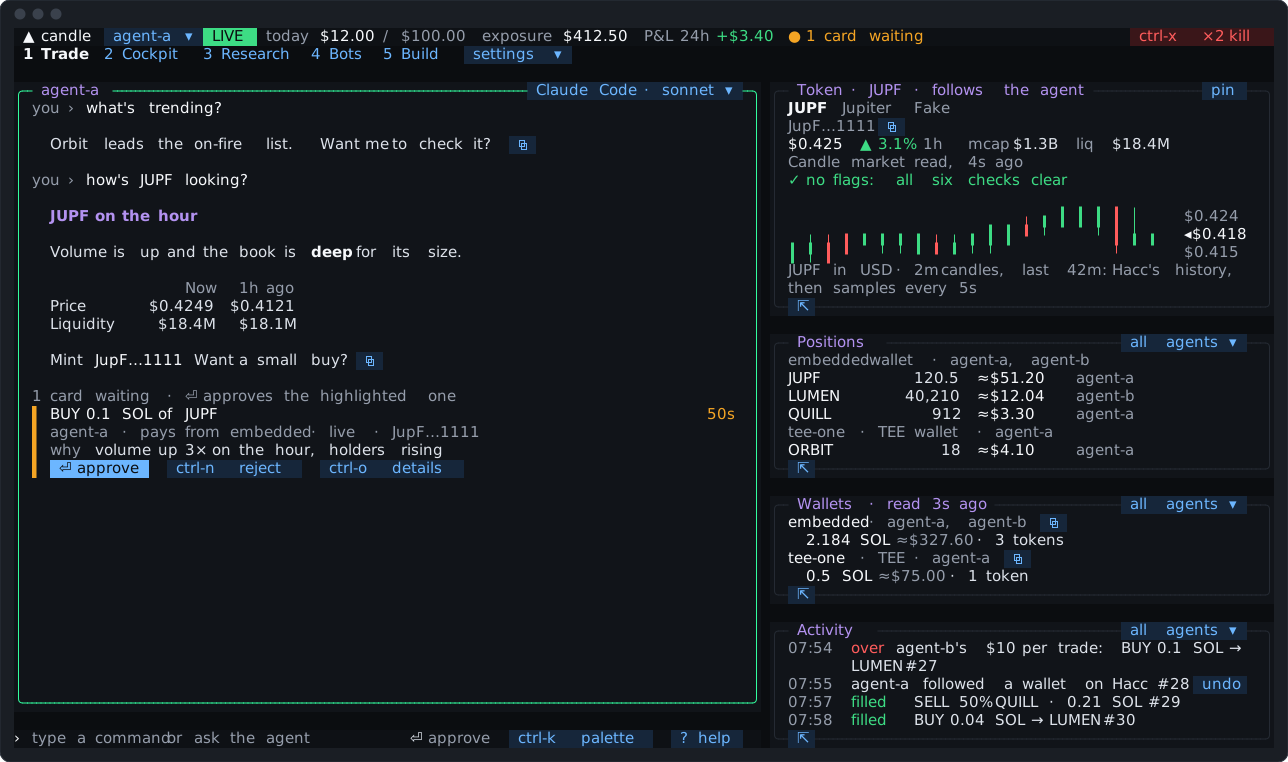
⏎, with the input line empty, approves it once it has shown for 300 ms. A click on its⏎ approvechip works too.ctrl-nrejects it.ctrl-oshows everything it’s bound to: the amounts, the wallet that pays, the limits it was checked against.
A trade you type in full is a card too, by default. Trading has the rest.
- The screen: find your way around.
- Safety: the kill switch, and what the agent can and can’t reach.
candle-harness doctorchecks your whole setup and says exactly what to fix. Troubleshooting goes through it.
Adding another agent
Section titled “Adding another agent”candle-harness setup runs setup again to add an agent, with its own key, limits, engine and memory. You can have up to 12.